In this guest article written by Gig Performer Community member @DennisT2022 you will learn how to set up MobileSheets to integrate it with Gig Performer. There are several posts in the community forum regarding MobileSheets, but there is no walk-through on how to download, install, set up your library, and create a setlist that is integrated with a Gig Performer setlist.
In this step-by-step example, MobileSheets will be installed on the same computer as Gig Performer. Once installed, it will import a song folder of over 600 songs. From there, a setlist can be created and MIDI messages programed to correspond to your setlist in Gig Performer. When you select a song from your setlist, it sends the MIDI Program Change message to Gig Performer, which in turn pulls up the corresponding song in your Gig Performer setlist.
What is MobileSheets?
.
MobileSheets is a comprehensive song library management application that is available for iPadOS, Android, and Windows.
Some of the features of MobileSheets library management include:
- Scales to Any Size
- Fast and Responsive
- Easy to Configure
- Supports Multiple Libraries
- Create, Merge, Delete, Setlists
- Filtering
- Bookmarks
.
At the time of writing, the cost for the software was $14.99 USD.
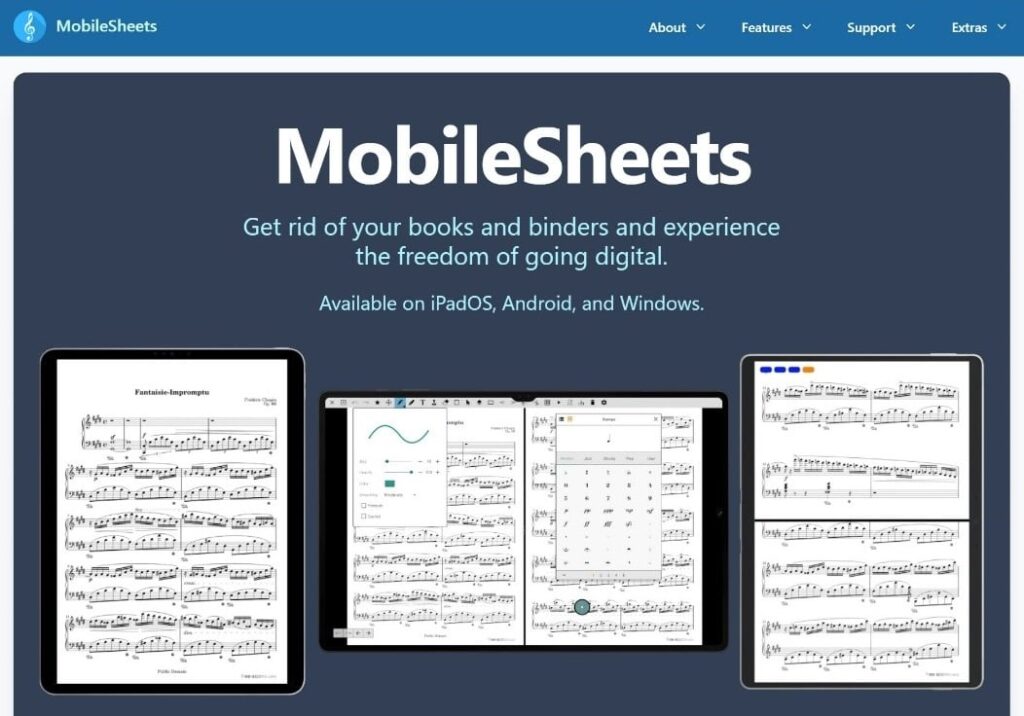
Where to get MobileSheets
.
MobileSheets is a product of Zubersoft, and can be purchased directly from their website, or it can be purchased from the Apple App Store, Google Play, or the Microsoft Store. In this example, you will see how to purchase directly from Zubersoft for use with a Windows 10/11 PC.
From any web browser, navigate to the following URL: https://www.zubersoft.com/mobilesheets/
Scroll to the bottom of the page to see the different paying options. In this example, we are using Zubersoft Store through FastSpring.
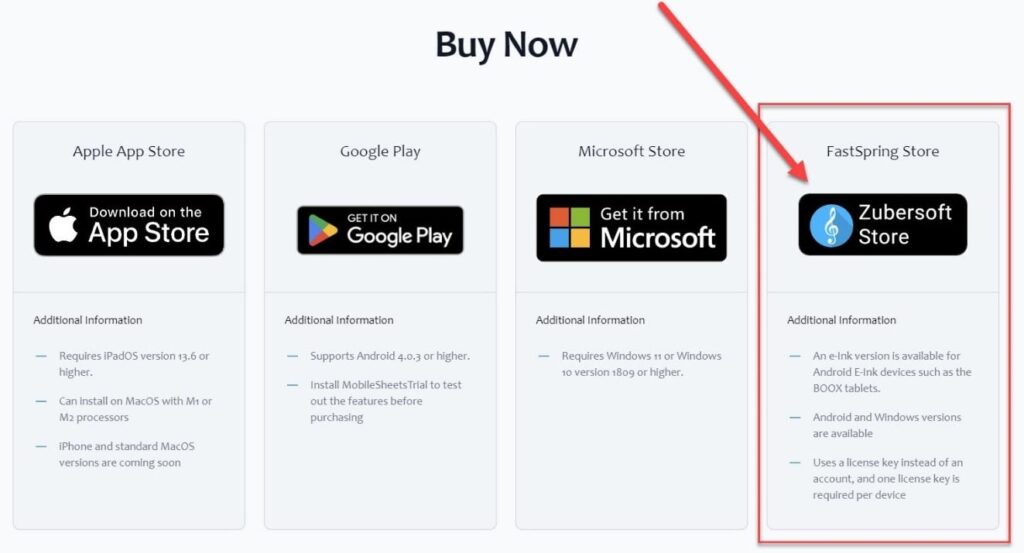
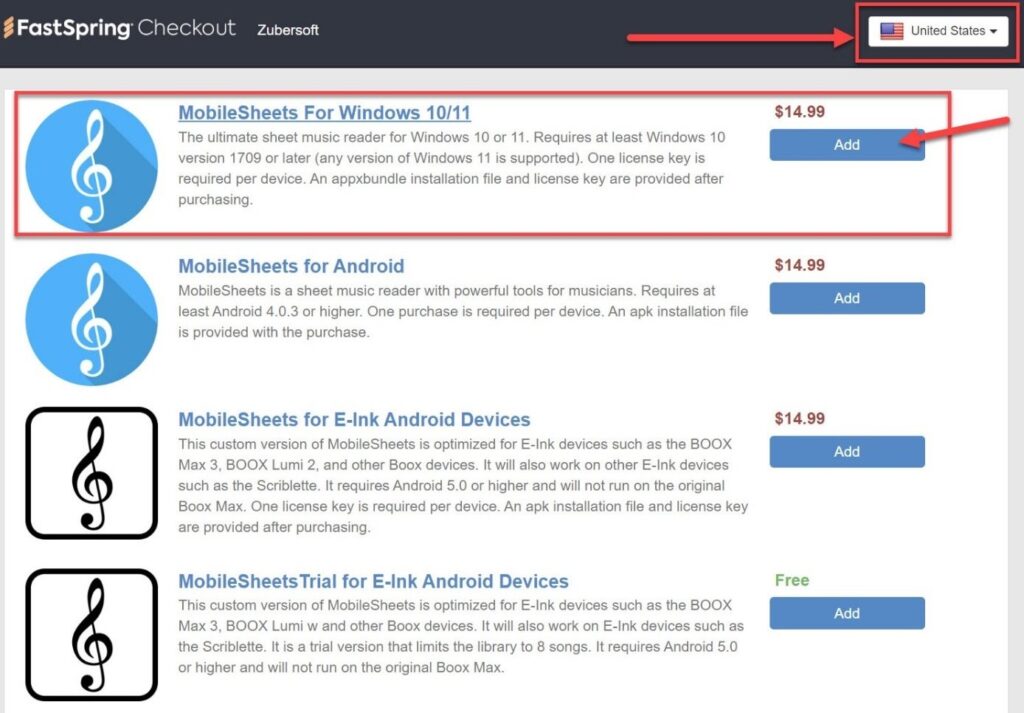
When you click on the Zubersoft Store it will take you to a page where you select your operating system version. From the Zubersoft Store, you can select either MobileSheets for Windows or for Android. (For the iPadOS version, you must go through the Apple App Store.)
Enter your home country in the upper, right-hand corner. Then select MobileSheets for Windows 10/11.
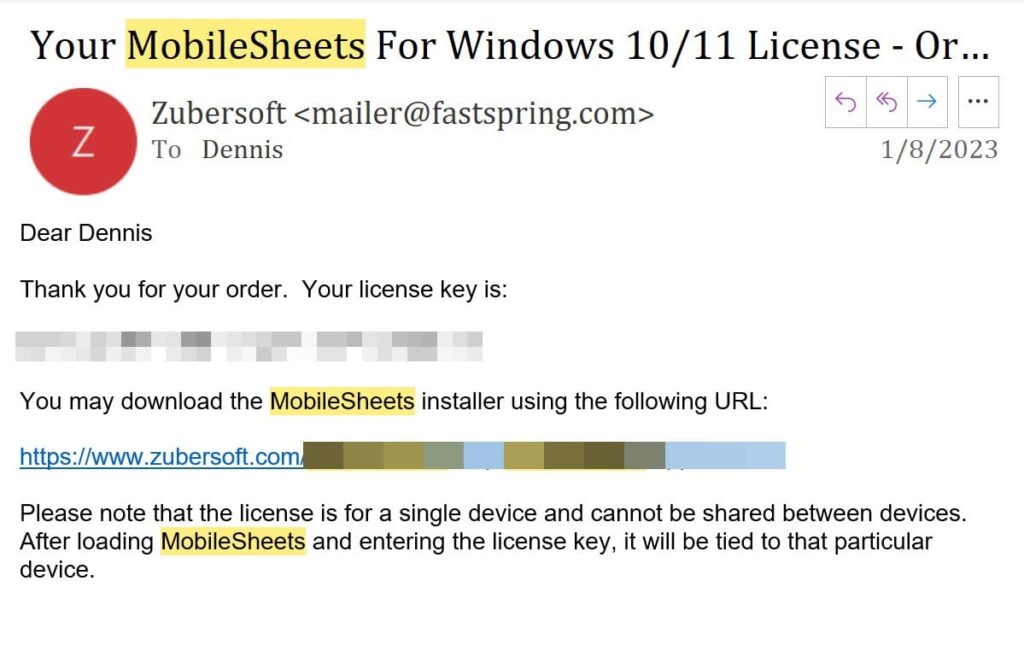
After completing your purchase, you will receive one, possibly two emails, confirming your purchase and providing you with your License Key and a download link.
An example of the purchase confirmation email:
An example of the second email:
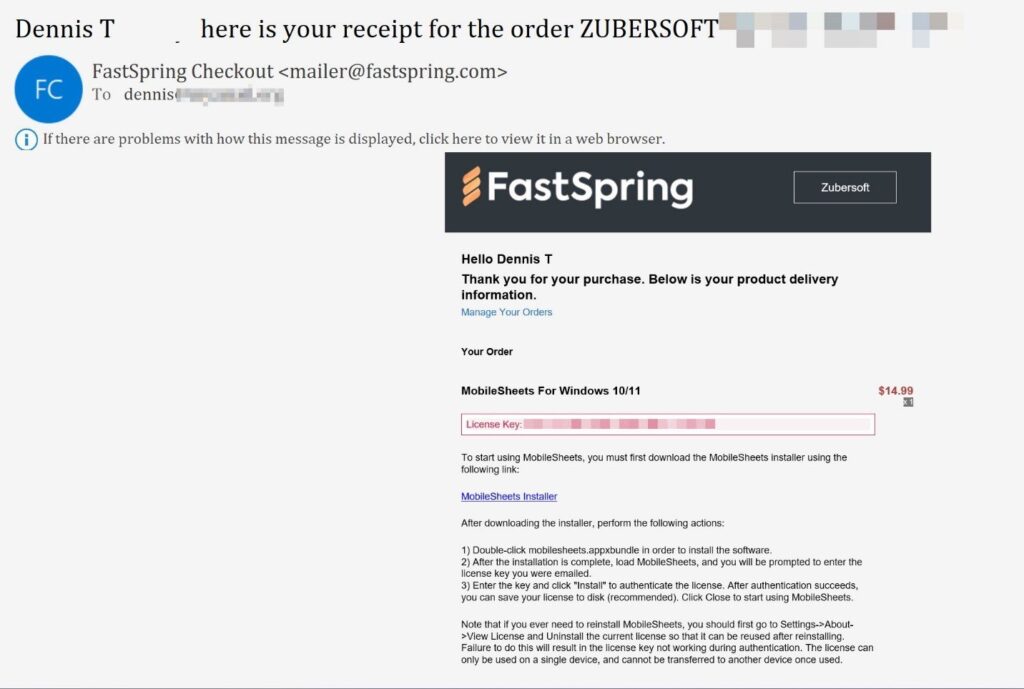
In the above email, there is a link to the MobileSheets installer file. Click that link to download and save the file to a location on your computer.
In this example, we created a sub-folder in the Downloads folder, and named the sub-folder MobileSheets.
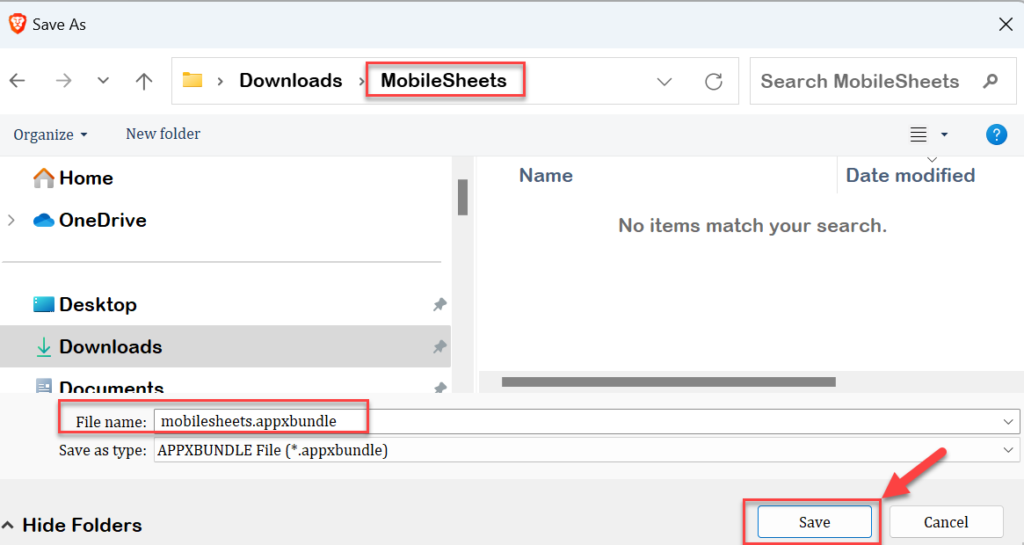
Installing the MobileSheets application
.
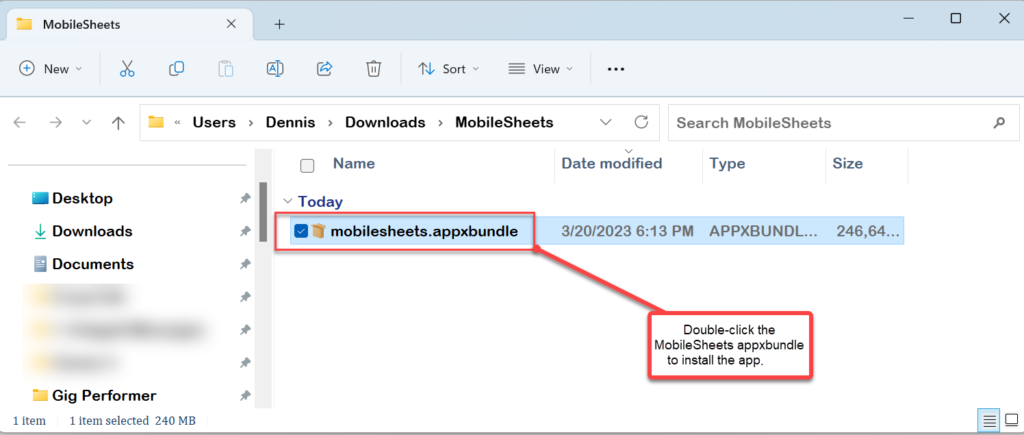
After the download is complete, double-click the MobileSheets appxbundle file to install the application.
Afterward, click the Install button:
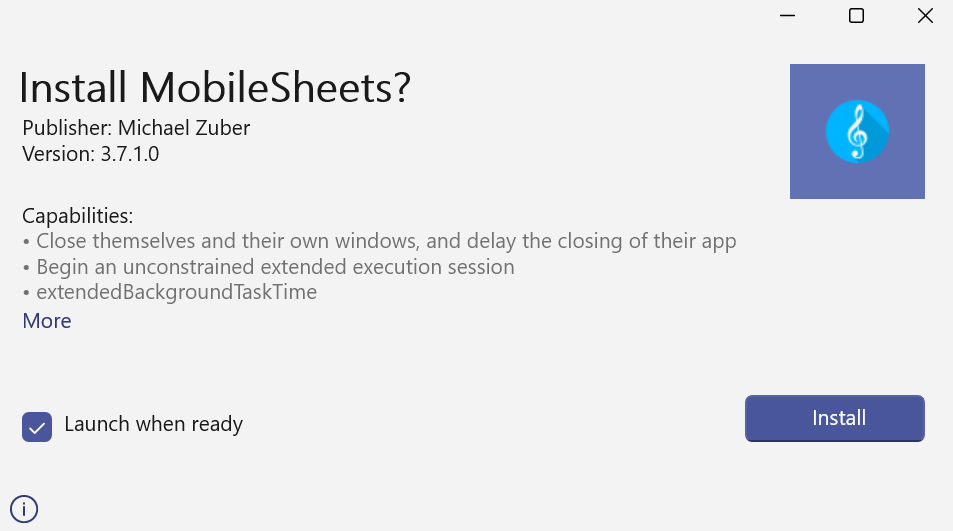
After the installation is complete, start the MobileSheets application (if it did not launch automatically), and you will be prompted to enter the license key that was emailed to you.
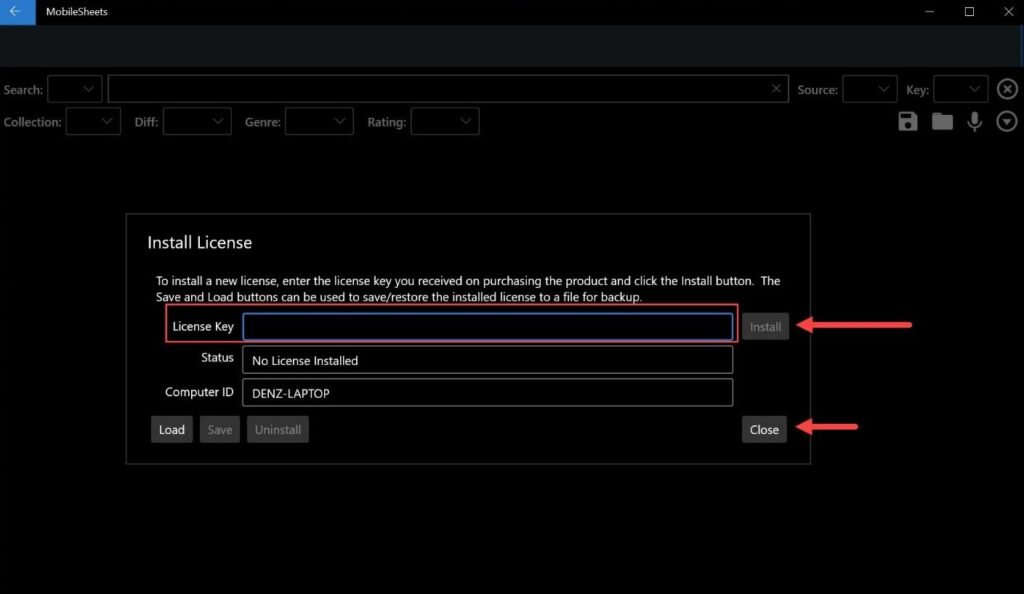
Enter the key and click the Install button to authenticate the license. After the authentication succeeds, the Status will change to License Installed. We recommend that you also save your license to disk (click the Save button and choose the desired location to sabe the license file).
Click the Close button to start using MobileSheets.
How to use the Batch Import feature to load hundreds of songs into MobileSheets
.
MobileSheets can handle thousands of song files. In fact, the developer states it could handle up to 50,000 song files, which includes PDF, JPG, GIF, PNG, BMP, and Text (txt) and Chord Pro files. (According to their website, Microsoft Word files (.docx) are currently not supported but may be added in the future)
Here, we will use the Batch Import function to import a folder that contains over 600 PDF song files. In this short video, the entire process to import this folder is about 1½ minutes:
.
As you can see, over 660 song files were imported into MobileSheets in about 1 minute, and it also sorts them. You also can search and filter the songs in a number of ways.
In addition to importing from your local drive, you can also import from Dropbox, Google Drive, and OneDrive.
How to create a Setlist in MobileSheets
.
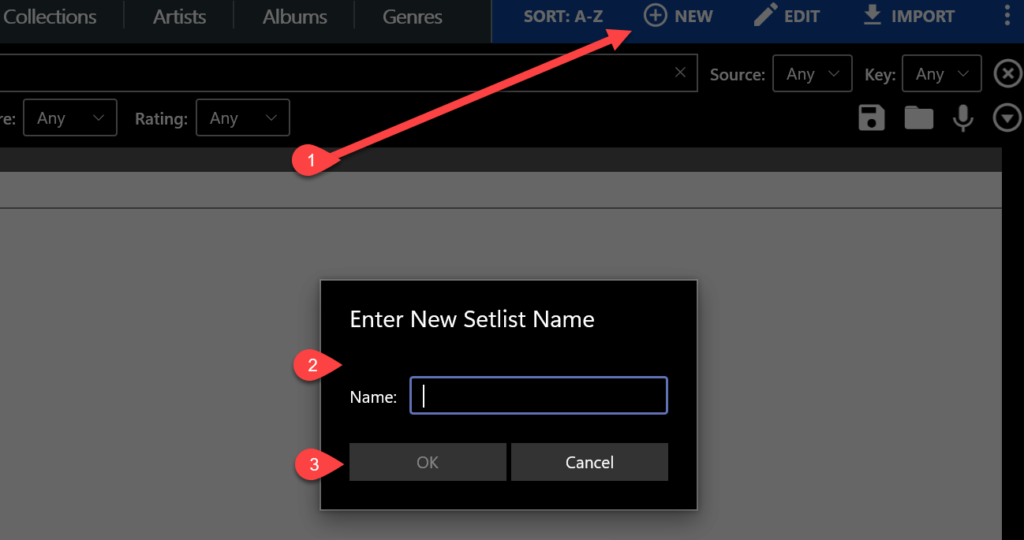
After you have imported your songs into MobileSheets, creating a Setlist is a snap. First launch MobileSheets; in the top menu bar, click on the Setlists tab.

When in the Setlist page, click on the New button (1), and in the pop-up window, give your setlist a name (2) and click OK (3).
When the Setlist creation window opens, a list of all your songs appears on the right-hand side. Simply click on the songs that you would like to add to your new setlist. As you select songs, they will be added to your setlist on the left-side window.
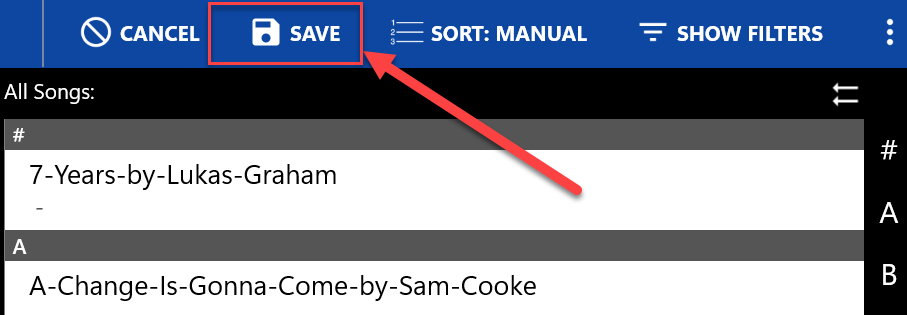
When you are done, click the Save button at the top, right-hand side of the menu bar.
Voila! You have just created your first setlist in about a minute or so.
Here’s a short video showing the Setlist creation in just over a minute:
.
How to send a MIDI Program Change from MobileSheets to Gig Performer
.
One of my most favorite features is using MobileSheets to automatically change my Song in Gig Performer.
First, open your setlist in MobileSheets. Right-click on a song, and select Edit Song from the top-right menu.
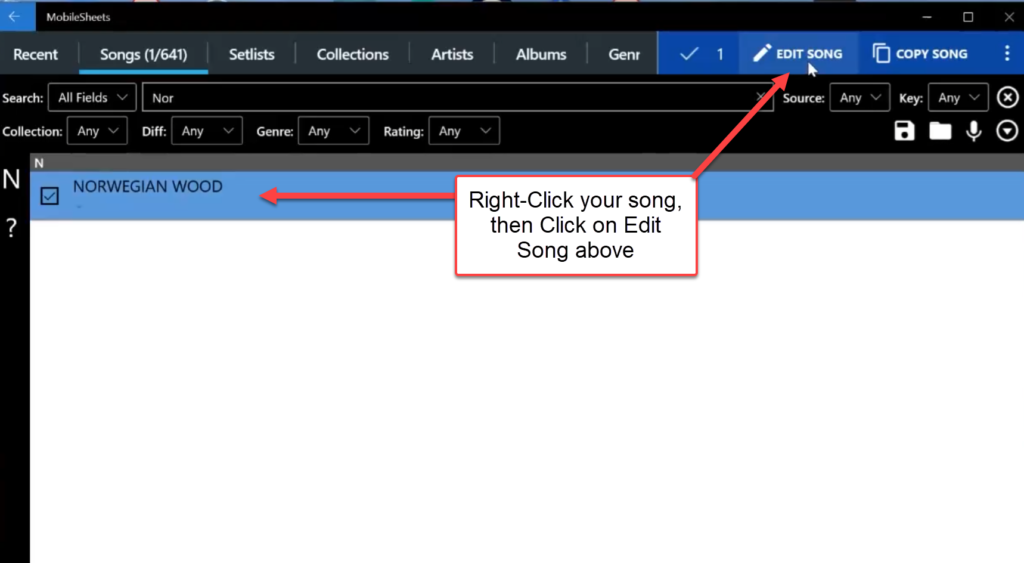
As you can see from the Fields tab in the Edit window, there are 18 different fields you can use to help sort, find, or manage your song list.
To add a MIDI command, click on the MIDI tab in the top. From the MIDI command window, click on the Plus sign to the right. In the pop-up window, add the relevant information to send a Program Change to Gig Performer. Note, the Command Number may be one number less than your corresponding song in your Gig Performer Setlist (depending on the Use zero-based PC numbers option in Gig Performer).
In this example, I am using Bome MIDI Translator as a Virtual MIDI connection to send MIDI messages from MobileSheets to Gig Performer. You can, however, can use another virtual MIDI solution, such as LoopMIDI by Tobias Erichsen.
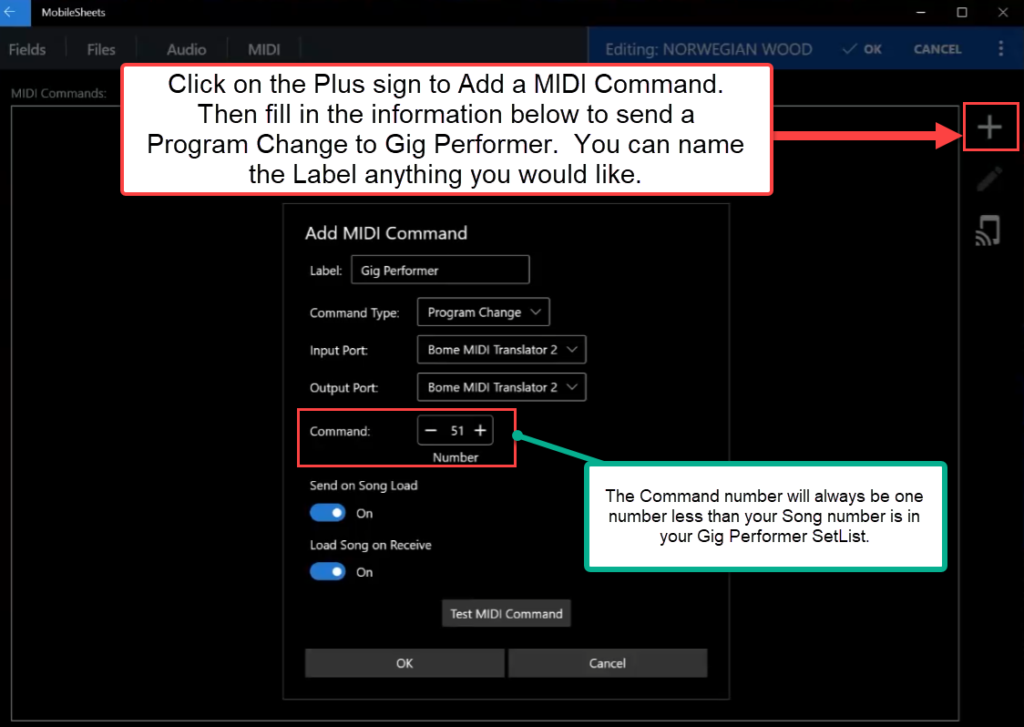
You can test your MIDI command by clicking the Test MIDI Command button — just make sure to have Gig Performer already running.
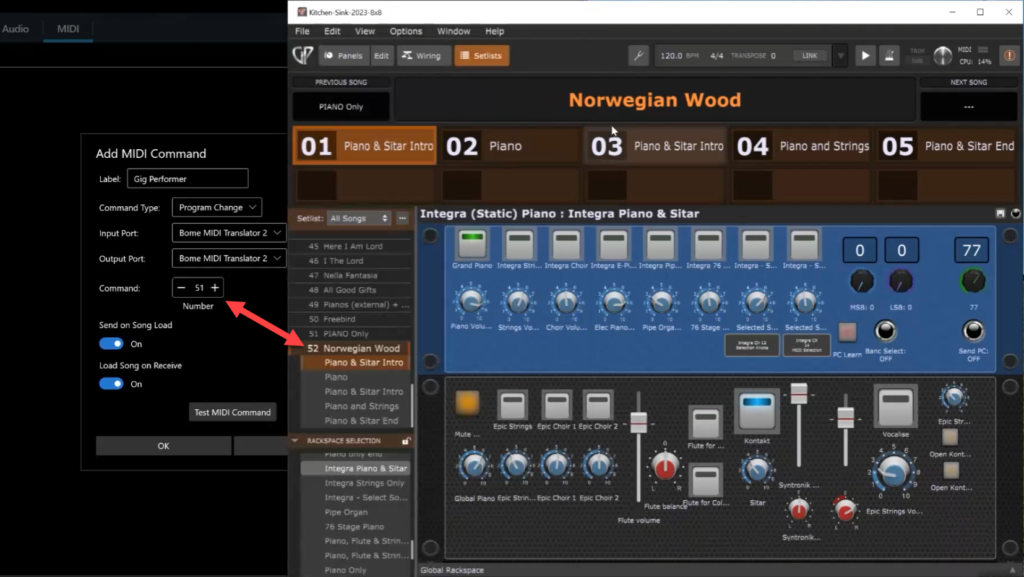
Note: you may want to use the Use zero-based PC numbers option in Gig Performer to match Program Change numbers (as otherwise, the program change number in MobileSheets is one less than the corresponding song number in Gig Performer).
Here’s a short video on how to setup the MIDI Program Change:
.
Here is one final video clip, showing MobileSheets in action with Gig Performer, i.e. showing MobileSheets changing between several songs while updating the Gig Performer Setist:
.
Besides being amazingly fast, MobileSheets screens can be resized to suit your needs. When I’m on my 17-inch laptop, I frequently have the MobileSheets window covering about two-thirds of my screen with Gig Performer showing underneath in the remaining screen space.
For more detailed information, download the manuals from the developer’s website here: https://www.zubersoft.com/mobilesheets/manual/
Enjoy, and keep the music coming!
—
If you have any questions or you want to share your feedback, please visit this Community thread.
.
Share this article to support Gig Performer and spread the word!
Own The Stage® with Gig Performer®
.
Related topics:
– Program Change Management
– The complete list of Gig Performer Resources at one place!


